

A compact and versatile unit, the Zinken Compact 21 can be a challenge to repair. These are some repair notes that may be of use.
In 2009, I was fortunate to get this unit from my father who, getting older, was moving on from wood working. This post records the details of my repairs in case they are useful to others. Most came from the reference at the bottom.
Motor Repair, April 2023
One day in April in the middle of a cut the saw suddenly stopped and tripped the safety switch, cutting power to the house. Removing the switch from the motor to see behind it and trying again, there was an electrical flash beyond the switch housing in the motor, well past what I could access.
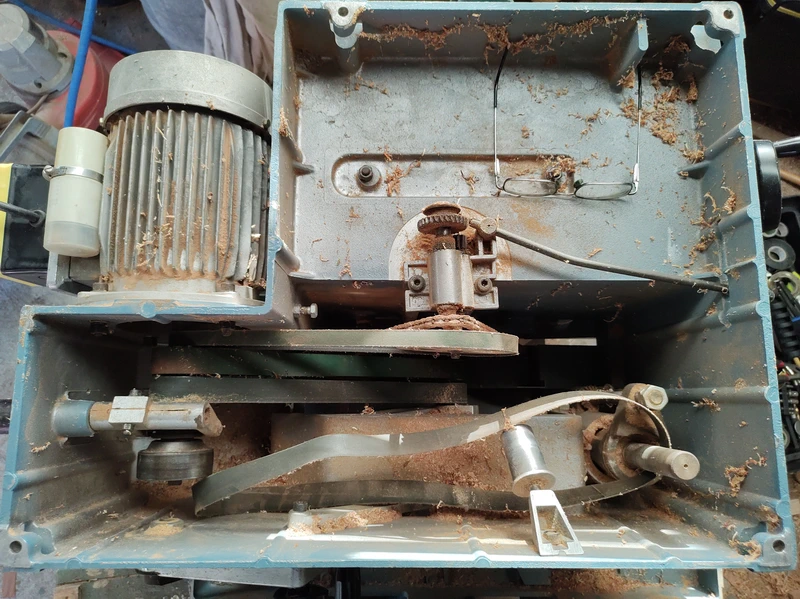
So, it was time to turn the machine over and remove the motor. This job turned out to be easier than expected, as the shaft did not need to be disassembled. The motor was taken to a specialist motor repairer, Eastland Electric Motors. The wiring was so badly shot it needed to be rewound. Dominic did an excellent job of restoring the motor to as new condition, and he also installed a new starting capacitor.
Note that the motor turns clockwise looking from the shaft end, an important fact for motor repairman.
Thicknesser Feed Drive
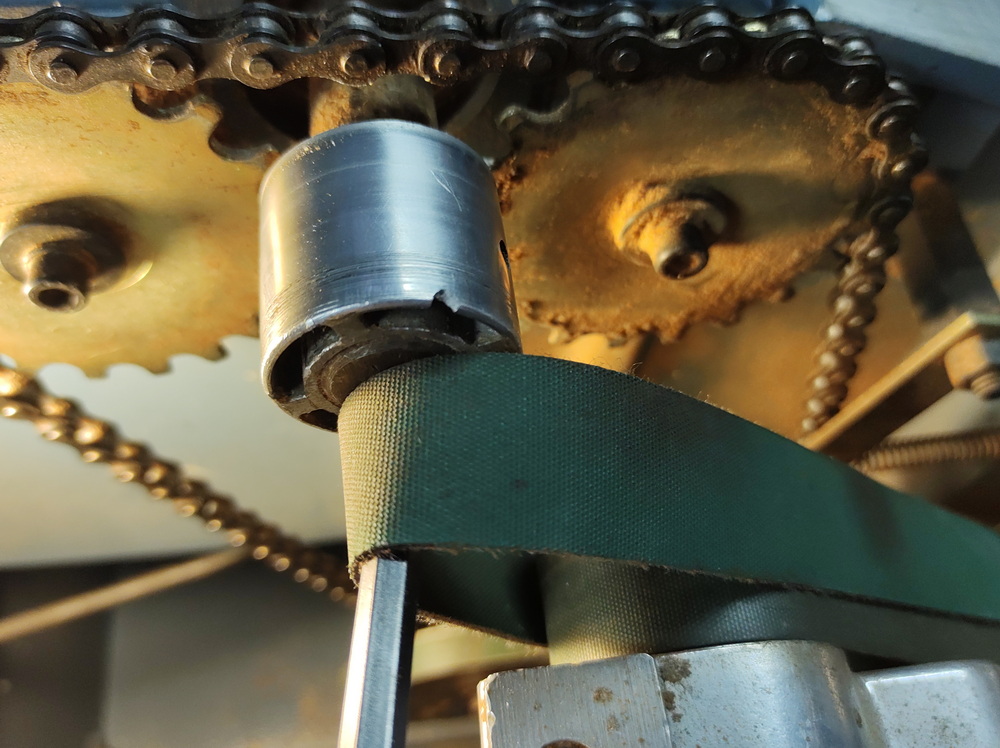
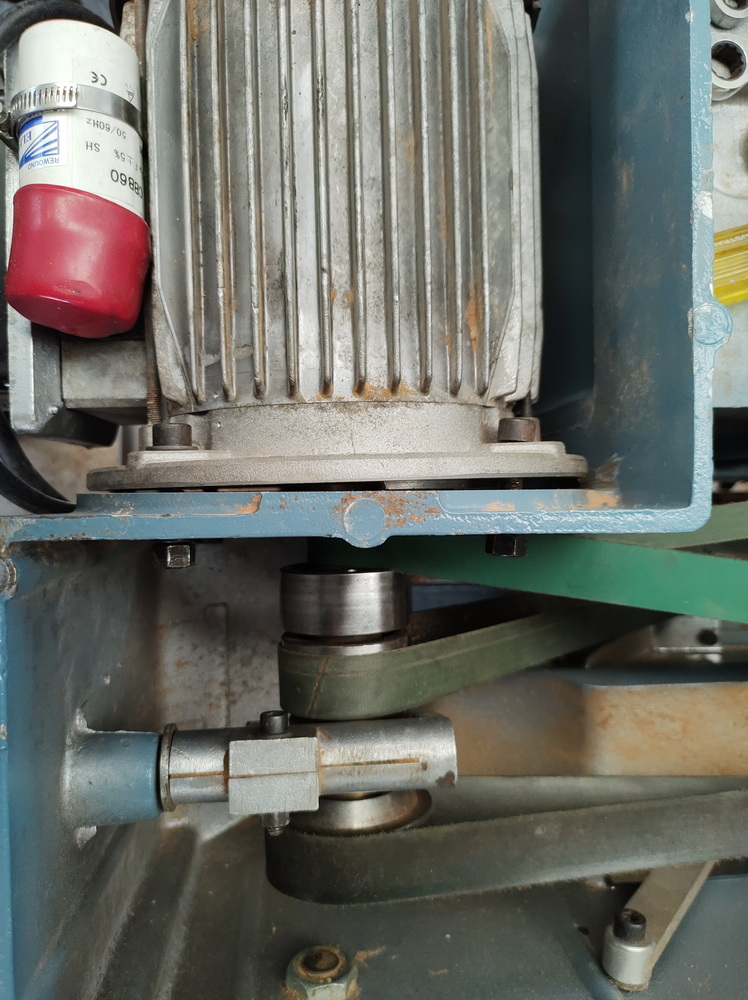
Whilst the unit was upside down, I noticed that the thicknesser feed drive pulley was out of alignment and being pulled towards the motor.
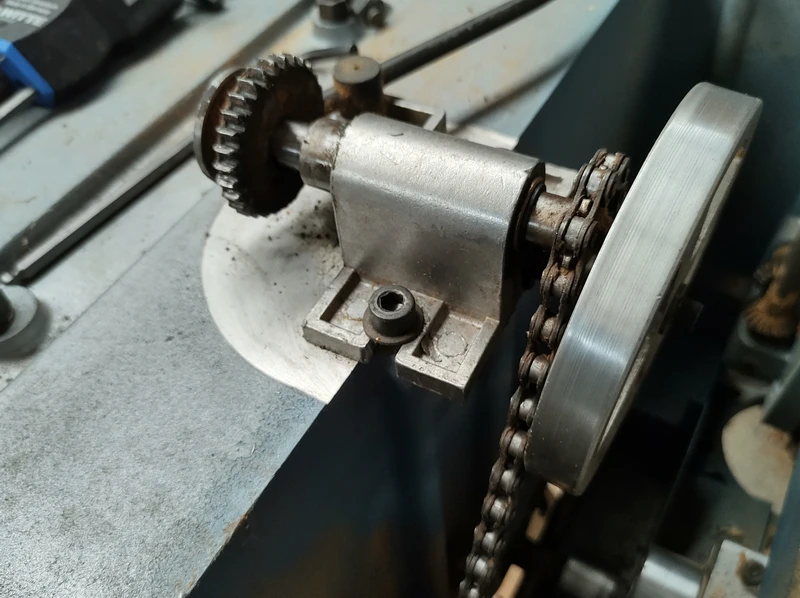
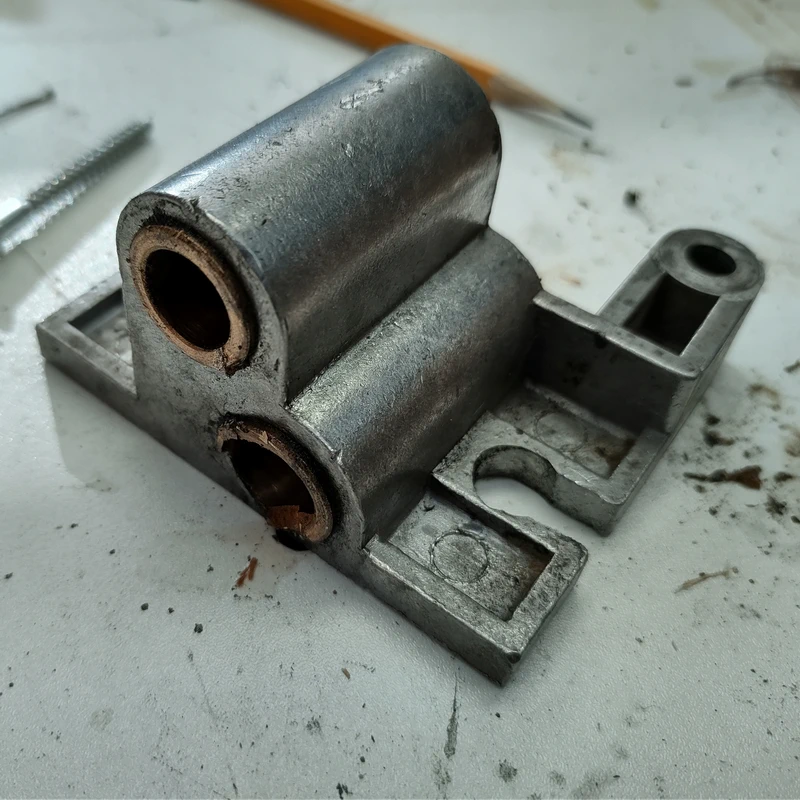

The bearings had to be replaced, and the pulley side was on its last shred of metal. Removing them was fiddly. I got some help from Kelvin of Tait Stainless, who carefully drilled it out with an 18 mm drill. A ¾ inch (about 19 mm) drill may have been better. The sleeve or plain bearings are about 1 cm into the housing from each end.
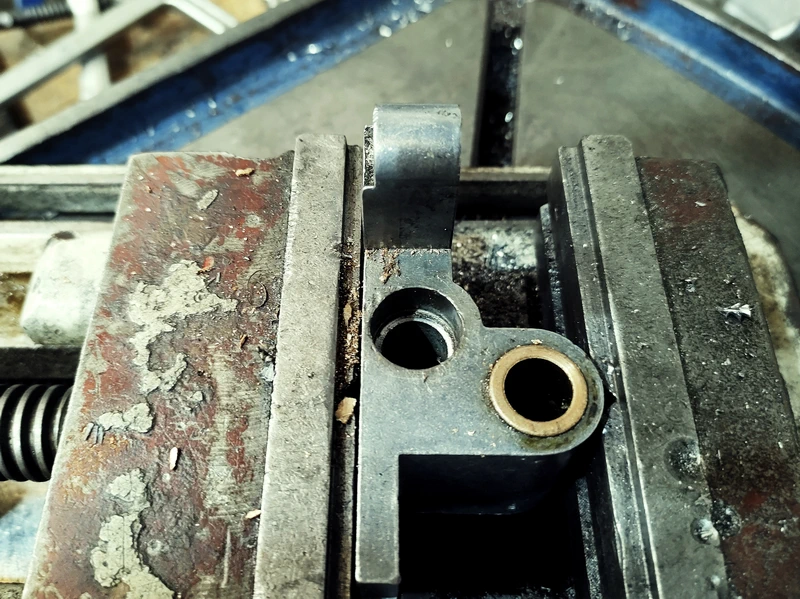
Once drilled, a punch was used to remove the remaining material. The new bearings, bought from Preston Bearings & Oil Seals, were carefully tapped into place, one each side. With some touches with a file by Kelvin, the axle was running smooth.
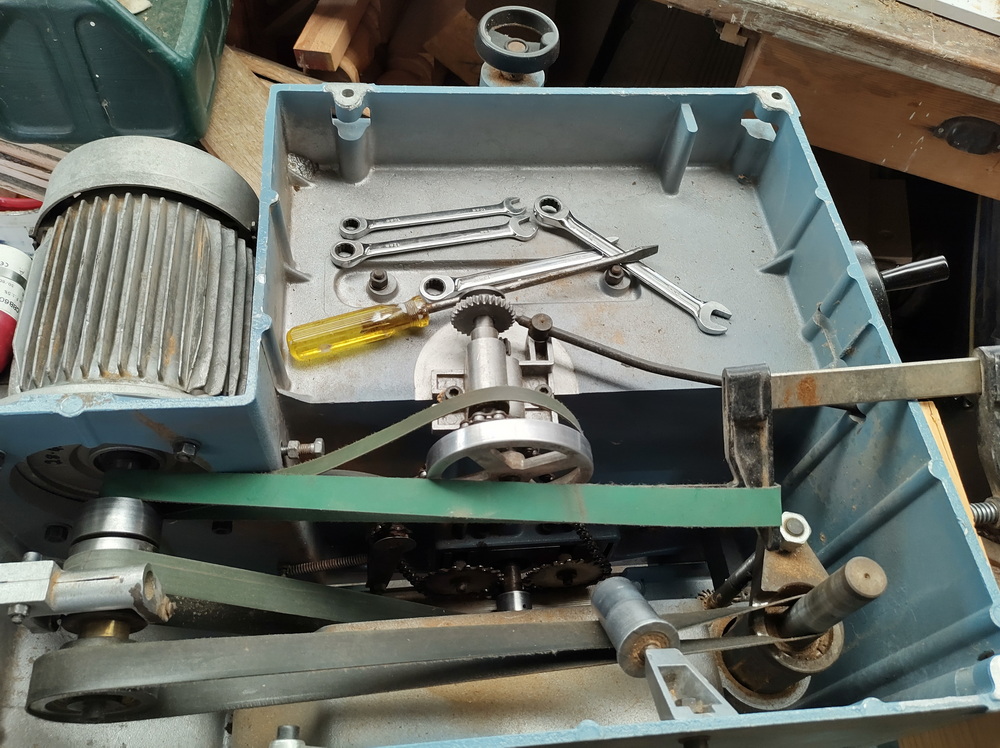
Reinstalling the Belts
With the feed roller drive assembly done, next was to reinstall the belts. The smaller feed roller drive went on first, next the thicknesser. But this one was very tight and was left loose on the motor shaft. Next the saw and spindle moulder were put on, and the shifting fork reinstalled.
Installing from the Top
The instructions show the thicknesser belt being put on from the top, so the machine was put back on its stand the right way up.
The photo shows the belt about 1 cm too short, and this made it impossible to get back on. I tried clamping the belt to the pulley and rotating it, but it kept slipping off. Heating the belt did not help either.
If a belt is tight, it’s easier to remount it using the larger of the two pulleys, so back into the upside down position for the machine.
Shortening the Shaft-Pulley Distance
Even with the larger pulley, it was still an impossible task.
So next, the motor mount was loosened to bring the shaft closer to the pulleys. A bolt used to adjust the motor position was removed (I’m not sure what it’s meant to do, as the mounting bolts don’t allow much movement). This loosened all belts, but still I could not get the thicknesser belt back on.
Stretching the Belt
Next, a clamp was used to stretch the belt. It fitted before disassembly, so maybe it shrank whilst it was off. I managed to get a bit of stretch out of it, and it was left for a few hours. Before removing the clamp, the belt was heated with a heat gun for a few moments. It was almost going on by hand, but what helped was a large screwdriver to push the belt onto the pulley.
It’s On!
After two days of messing around, it was back on. The motor mounts were tightened with the motor put back into the correct position.
The belt is very tight, much tighter than the others. As it has a newer, brighter green colour, I suspect it has been replaced with a belt that’s a bit too short. I put some belt grip spray (like contact glue) on the saw belt, as I don’t want this one to slip.
After turning the machine back onto its stand, the right way up, the last parts were put back on and the Zinken Compact 21 is ready to again do woodwork.
Main Switch Failure, March 2021
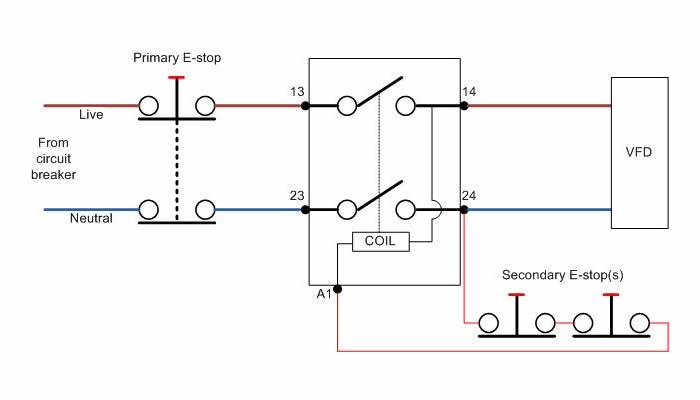
March 2021 saw the failure of the switch box located on the motor. Not having a circuit diagram made it difficult to understand how it worked. I suspect there was overload protection, as the power seemed to flow through a coil.
It was easier to get a new switch box. An NVR (No Volt Release) switch is needed, one that will not remain switched on if power is lost, is paramount for the user’s safety.

The installation needed a cover plate, as the new switch has a smaller footprint than the old one. Connecting to the motor revealed wiring that had badly cracked insulation, and the wire itself was corroded. Soldering worked and with heat shrink tubing the connection all went well until one day.
Useful Facts and Figures
Some information that may be useful when renewing a Zinken Compact 21 combination saw bench, thicknesser, spindle moulder and mortiser.
Pitfalls
- Turn the machine on its table to access.
- The drive shaft retaining bolt (at the end of the shaft) is reverse threaded (M8, 22 long thread).
- A bearing puller is required for drive shaft with a reach of >110 mm
Bearings
Bearings do wear out and replacements are easily available. They are metric and available from standard suppliers. Steel sides (ZZ).
- Spindle Moulder Belt Idler: 6000 (x2)
- Spindle Moulder:
6205
6005 (47odx25idx12thk) - Saw: 6001 (x2)
- Planer: 6304 “ZR” (x2)
- Drive Shaft (starting closest to motor)
6205ZZ: 52od x 25id x 15thk (1): 6205 - Square Slider Table Rollers: 626 (x6)
- 6005ZZ: 47od x 25id x 12thk (x2): 6005
- Drive Shaft (starting closest to motor)
Sources: Applied Industrial Geebung, CBC Eagle Farm
Belts
Must be custom-made. Use type F1, GT 10P, 1.6 mm from Forbo
- Saw: 815×25
- Planer: 930×25
- Moulder: 1050×25
- Feed: 750×15
Sources: Forbo Virginia

My Zinken ZC-21 has been apart for 5 months while the motor was being rewound. Now that I’m reassembling I cant figure out where the split sleeve goes. It’s 25mm ID x 30mm OD x 23mm long. Any help greatle appreciated.
Would you be able to send a photo of the parts?